

29 September 2010
27 September 2010
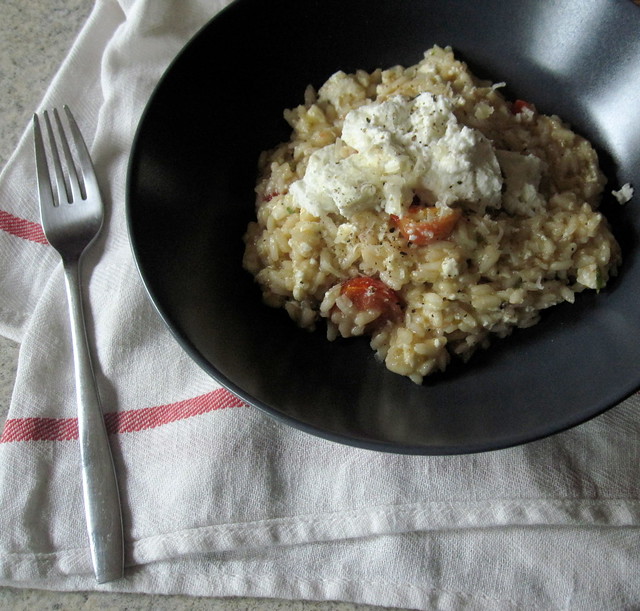
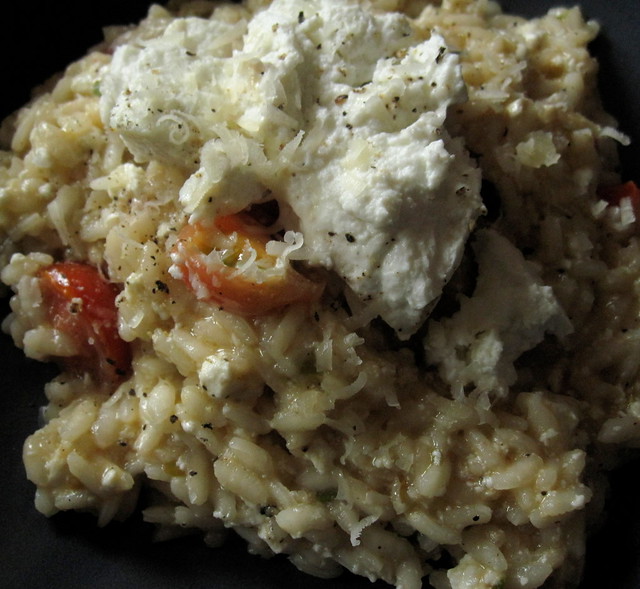
Risotto with Baked Ricotta, Tomato and Herbs
I won something! I never win anything!
I entered a competition on the Laverstoke blog to win a parcel of their lovely buffalo ricotta and I won!
What was even better is that they sent me a whole array of goodies, I got two pots of their fresh mozarella, some of their smoked streaky bacon, a big pot of ricotta and a carton of buffalo milk.

We have enjoyed the mozarella on pizza and the bacon in sandwiches (naturally) and diced and combined with some ricotta gnocchi (I used the rest of the ricotta here). We aren't sure what to do with the buffalo milk, I could make burrata (although I do have a lot of mozarella already) or we could just have it in our tea!
Being as the ricotta was the main prize I thought I'd come up with a nice recipe for you. This risotto is slightly summery but comforting enough to warm you up on this early autumn days. The ricotta is baked in the oven for 10 minutes which makes it meltingly tender and allows you to infuse it with herbs.
Risotto with Baked Ricotta, Tomato and Herbs
serves 2
Knob of butter
olive oil
approx 200g arborio rice
2 cloves of garlic
handful of cherry tomatoes
about 1 tablespoon of fresh italian herbs - I used sage and oregano
about 1 pint hot chicken stock
parmesan
4 tablespoons of ricotta
First preheat your oven to a medium heat. Put your ricotta in a small ovenproof dish, spinkle with herbs, olive oil and seasoning. Bake in the oven for 10 minutes whilst you make your risotto base.
Chop the tomatoes into halves or quarters, add to a bowl and add a little olive oil, cider vinegar and seasoning. Leave to stand whilst you make your risotto.
Next start to make your risotto. Melt your butter with a splash of olive oil in a large nonstick pan, add in your crushed garlic and fry for a minute. Then add in your rice. Stir quickly to coat all the rice in butter and oil. Cook for another minute. Then start to ladle in your stock in small amounts, stirring and waiting for the stock to absorb before you add the next ladle. Keep testing your rice for done-ness all the time, you might not need all of your stock.
When the rice is about 3/4 done add in your tomatoes, herbs, another knob of butter and about 2 tablepsoons of parmesan, stir to combine and melt the cheese and butter. Take your ricotta out the oven. Put half into your risotto and stir in.
Once the rice is done and everything combine in the pan serve in warmed bowls. Divide the rest of the baked ricotta between the plates and serve on top. Serve with a bit more parmesan and black pepper.
Yum!
You can find Laverstoke in branches of Waitrose and some Sainsburys. You can also buy from their website.
24 September 2010
$10 Sale on Etsy!
I'm having a bit of a silly sale on Etsy at the moment, to clear up some jewellery ready for more new designs.

Vintage glass, pearl , lucite, silver and brass jewellery and a very bargainous $10 locket!
Grab a bargain!
Vintage glass, pearl , lucite, silver and brass jewellery and a very bargainous $10 locket!
Grab a bargain!
22 September 2010
20 September 2010
Callyco Fabric Shop, Cambridge

image courtesy of Callyco on Facebook
Things are really catching up on the crafty scene in Cambridge!
First a lovely bead shop and now this beautiful fabric shop on Peas Hill.

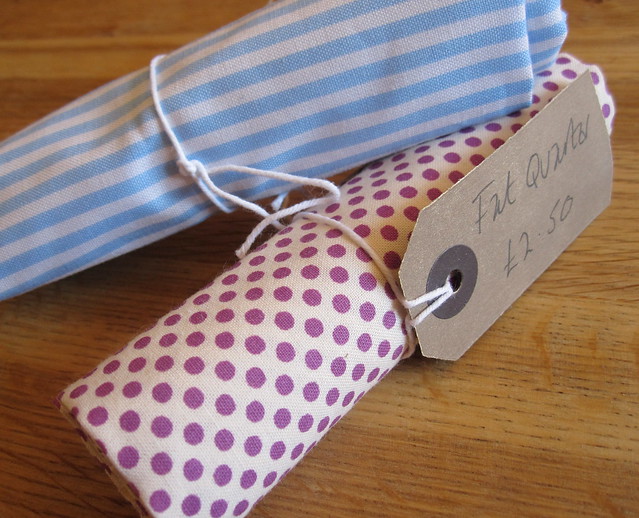
What is really handy for a hobby sewer like me is that they sell fat quarters and remnants, I picked up two rolls of cotton - one purple (obviously) with spots and some nice blue stripy fabric. I think I'll be making these into bunting, I did forget to buy any trim though!
17 September 2010
Ginger Molasses Cupcakes - Happy National Cupcake Week!
Happy National Cupcake Week everyone!
I believe this week is just promotional for a baking magazine but it is a good enough excuse for me to bake cupcakes, so yay!
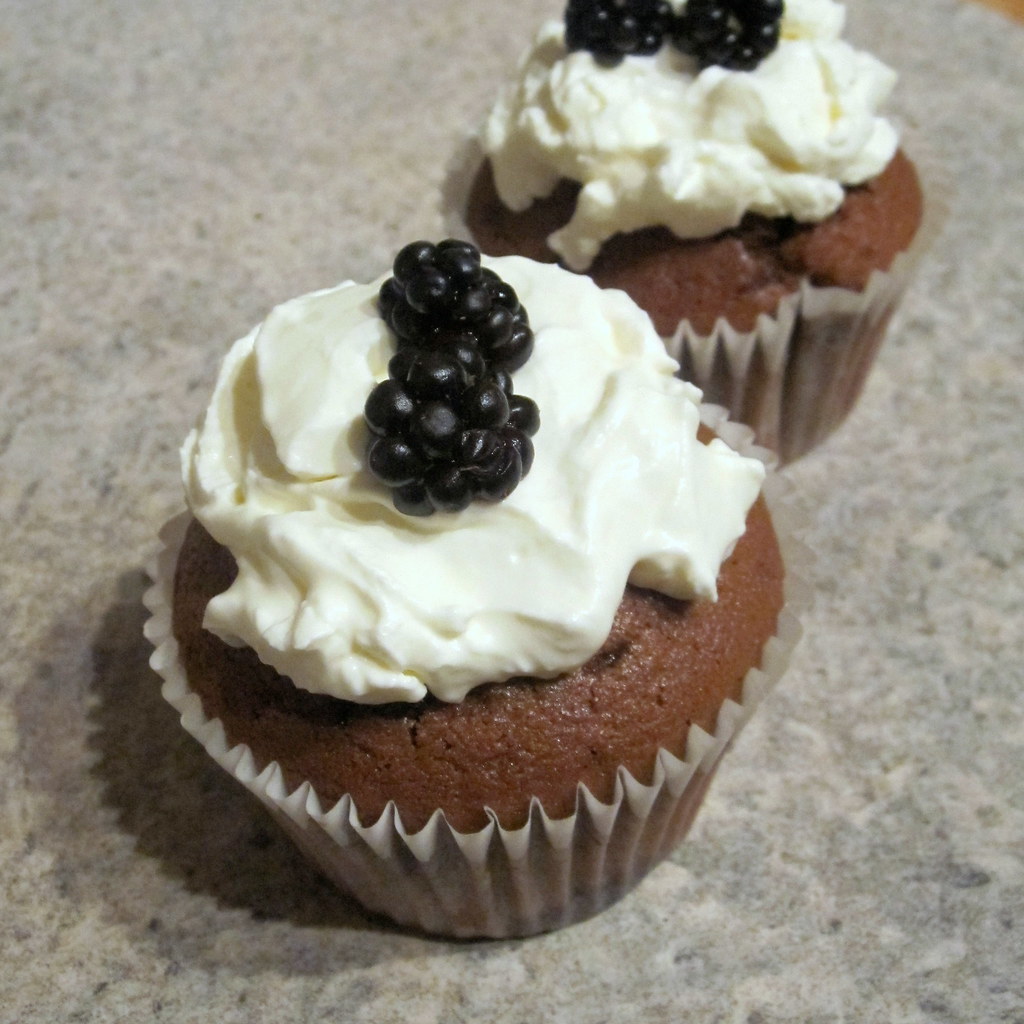
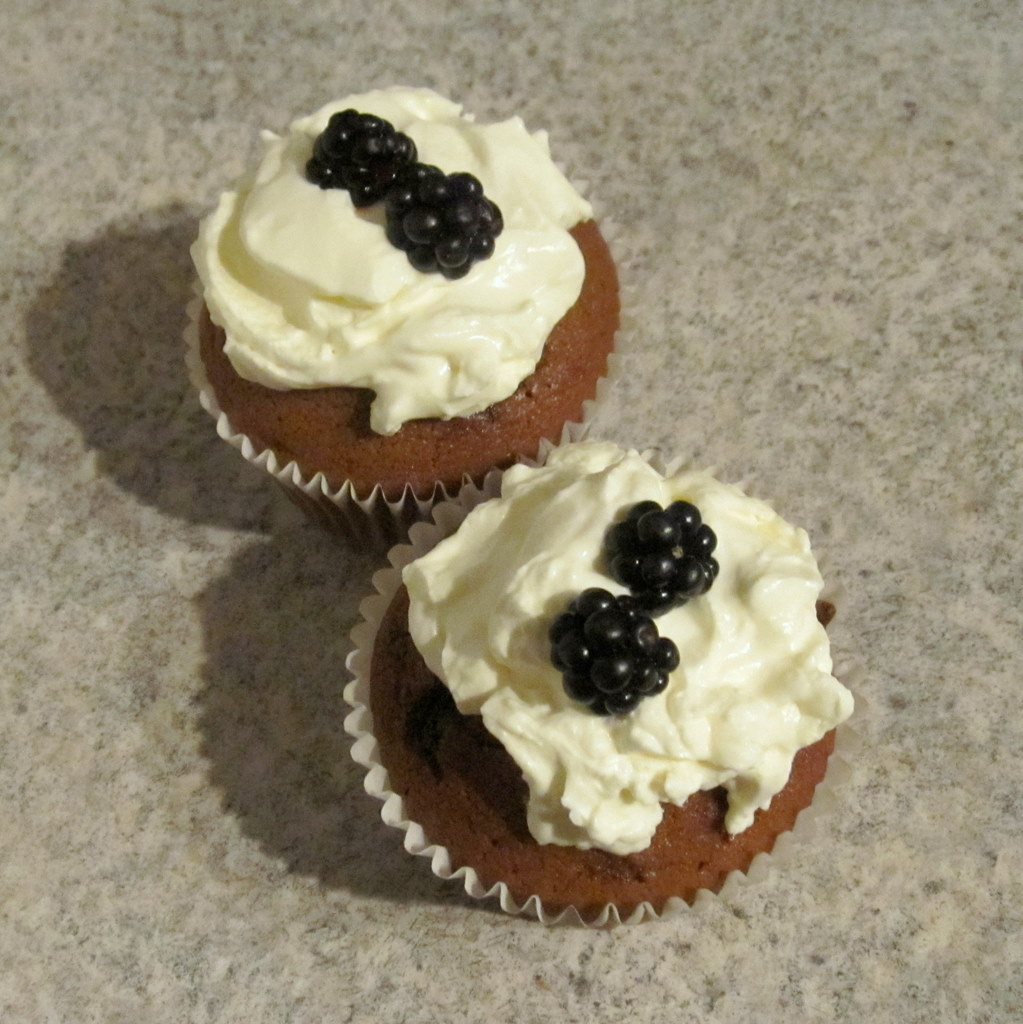
As the weather is getting colder and Autumn is approaching I thought I'd make something comforting and spicy. I had some muscovado molasses sugar in the cupboard and ginger seemed like a good match, a bit like sticky toffee pudding without the dates. I have iced the cupcakes with a light lemon cream frosting which goes really well against the rich sponge.
Ginger Molasses Cupcakes
Makes 12 large cupcakes
100g butter, softened
175g dark muscovado or muscovado molasses sugar
2 eggs
dash of vanilla extract
zest of half a lemon - optional
175g self raising flour
175ml buttermilk or whole milk
1 heaped teaspoon of ground ginger - I opted for ground as I didn't want stringy bits of fresh ginger in my cakes.
Mix together your butter and sugar until fully combined, you may need to blend it slightly to combine as the sugar is thicker and denser. Whisk in your eggs one by one using a hand whisk or an electric one. Then add in the vanilla, ginger and lemon if using.
Alternately add a small amount of your flour (sifted in) and buttermilk/milk til all of it is used up.
Fill cupcake cases up 1cm from the top, you want nice full cupcakes, and bake in a preheated medium oven for 15-20minutes until cooked through.
Light Lemon Cream Icing
Ices 12 cupcakes
100ml of double cream
juice of one lemon
3 tabelspoons of icing sugar
Whisk your cream with an electric whisk until it forms soft peaks, then slowly with a hand whisk combine in your icing sugar and lemon juice. Taste for sweetness/lemonness, add more to your taste.
Chill in the fridge until the cupcakes are ready to ice. These cupcakes are best iced just before you eat them so the cakes don't get soggy. The icing will keep in a bowl in the fridge for a couple of days so you can ice as you go!
I topped mine with some cute little blackberries that I picked in my garden, they worked really well with the creamy gingery cupcake.
Yum! I hope you bake something yummy for national cupcake week.
Deepa
x
ps - apologies for the quality of the pics, it is getting dark in the evenings! :(
14 September 2010

13 September 2010
Spiced One Bowl Brownies

These recipes require something which I don't normally ever use in baking - a microwave. The butter and chocolate is melted in the microwave for a couple of minutes and then the other ingredients stirred in one by one.
I've adapted the recipe to include some spices (something that feels very autumnal!) - ginger, cinnamon and smoked paprika - trust me the smoked paprika is good.

I much prefer very gooey brownies but my husband prefers his more like a moist cake - these are more of a cakey brownie with a lightly crisped top. If you like gooeyness then use about 50g less of the flour.
Spiced One Bowl Brownies
adapted from all recipes
NB - I made this recipe again but with only 75g of flour and 25g cocoa powder, it gave a gooier brownie with a crisper top, good if you like them this way!
100g good quality dark chocolate (70%), broken in to pieces
70g butter
100g sugar
2 eggs
1/2 tsp vanilla extract
150g plain flour
1/2 tsp baking powder
1/2 tsp ground ginger
1/2 tsp cinamonn
1/2 tsp smoked paprika
Preheat your oven to 400f, 200c or gas mark 6
Put the butter and chocolate into a large microwavable bowl, microwave on high for 2 minutes.
Remove from the microwave and stir together til the chocolate is completely melted in with the butter.
Stir in sugar til combined.
Stir in your eggs one by one and then add in your vanilla.
Sift in your flour, baking powder and spices, fold in to combine.
Pour into a greased and lined, or non stick, square 9inch pan. Bake in the oven for 20-25 minutes until just done - your knife should come out with a few crumbs when inserted - the great thing about brownies is that it isn't a disaster if they are underdone because it equals more gooeyness!

6 September 2010
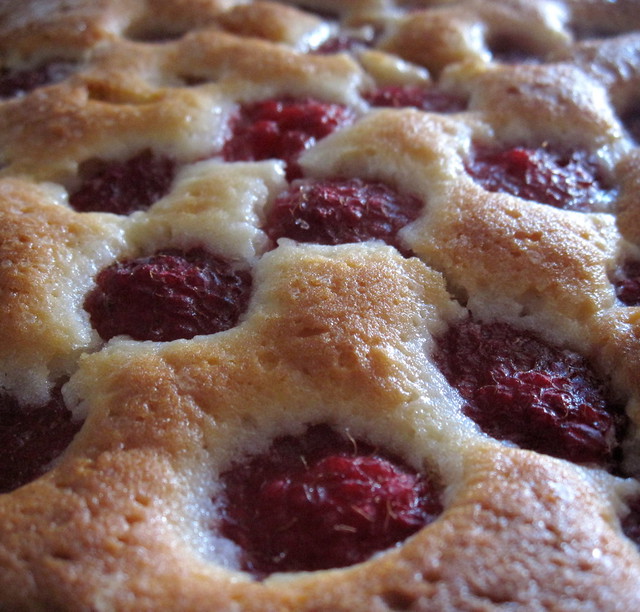
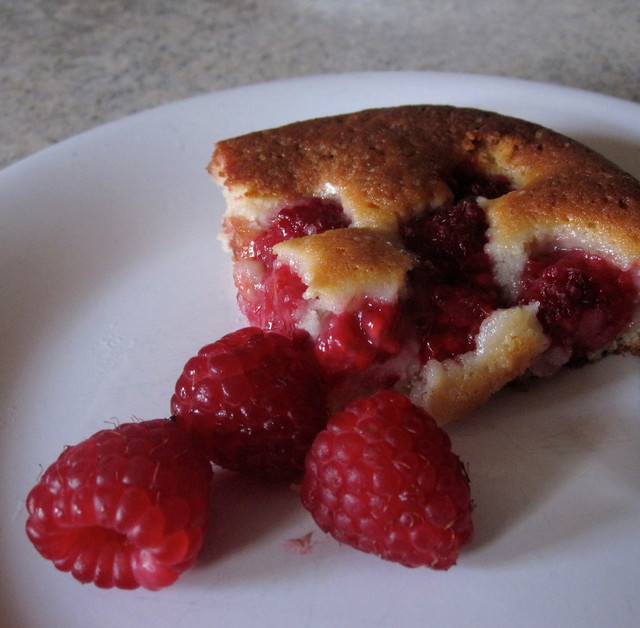
Raspberry Buttermilk Cake
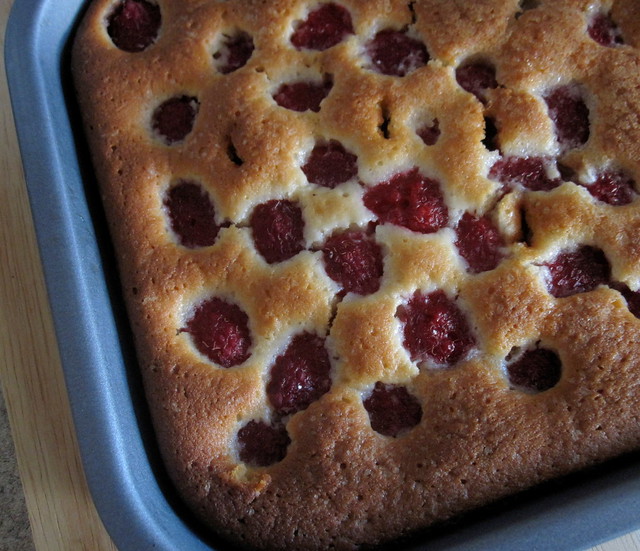
I think this may well be the most perfect cake I have made. Hurray!
I cooked this cake in my lovely new non stick brownie pan, to get little squares of cake all neat and tidy. Yes I am weird.
I have made this cake before with blackberries and it was good then, but this time I spent a bit more time whisking to get a light fluffy batter, I had a nice cake tin and my oven was behaving.
I am a big fan of buttermilk in cakes, it stops any cake from becoming dry, and makes it easier to mix.
I also swapped out half the sugar for honey instead, which didn't affect the flavour (in fact I think all sugar would have been too sweet) and makes it a teeeeny bit healthier (ish).You will also notice that this cake only has 50grams of butter in it!
This cake is very versatile, as I mentioned I have made it with blackberries before, you can swap out the raspberries for any small soft fruit - blueberries, strawberries- maybe even some small plums halved. I might even give it a go with rhubarb as our plant has gone a bit huge! You could even use the cake mixture as a base for a nice chocolate chip cake - oooh now there is an idea! Anyway I am going off on a tangent here...
I made these with some sweet local raspberries from my local market, they are nearly at the end of the season now and this cake is a lovely last wave to the summer fruits.
Raspberry Buttermilk Cake
adapted from Smitten Kitchen & Gourmet
50 grams of unsalted butter (1 stick)
75g of caster sugar (1/3 cup)
75g honey (1/3 cup)
1 large free range egg
1/2 teaspoon vanilla extract
zest of half a lemon - optional
1/4 teaspoon of salt
130grams of self raising flour (1 cup)
1/4 teaspoon baking powder
110ml buttermilk (1/2 cup) - you can make buttermilk by adding 1 tablespoon of vinegar to cream or milk, leave for 10 minutes before adding.
150g fresh raspberries (1cup)
Cream together your butter, sugar and honey - in a mixture or using an electric whisk is best - til light and fluffy. Add in your egg and whisk to combine. Then add in your vanilla and zest and combine again.
Then alternately add in your flour and buttermilk, adding a small amount of each, combining and adding the next. Have your mixer on a medium setting and your whisk on a medium too.
Once nicely incorporated spoon the mixture into a 9 inch round or square cake in, non stick or lined with paper. Then lay your raspberries on top, I started off trying to be nice and neat but then by the time I tried to squish all the berries in it was a bit more messy!
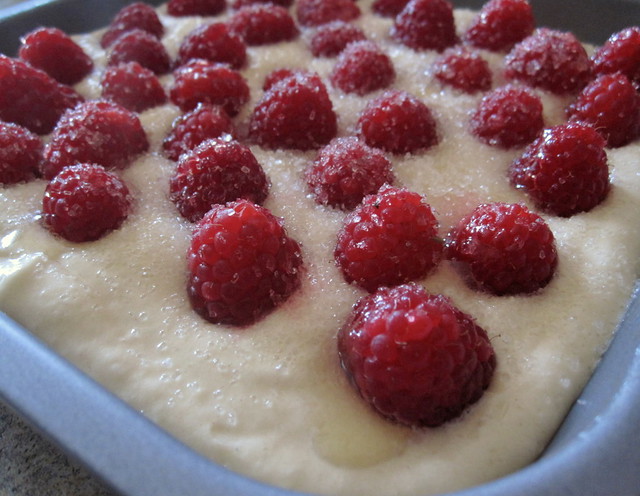
Sprinkle with 1 tablespoon of sugar and optionally you can also drizzle on some honey.
Bake in the oven for 20 - 25 minutes until cooked through and golden brown.
Leave to cool for 10 minutes before turning out on to a board and then on to a plate.
UPDATE: I made this again a few days later with Rhubarb (yes we ate the raspberry one really quickly) and it was really good. I cut 2 sticks of rhubarb in to small chunks, sprinkled it with 1 tbsp sugar and let it sit for a 5 minutes then scattered over the top of the cake and baked in the oven as normal. I also added some ground ginger to the batter, yum!
5 September 2010
Etsy Anniversary & 20% off
UPDATE: Extended for one more day - 20% until Tuesday 7th 9am UK Time!
Today is my 3rd Etsy Anniversary, or Etsyversary!
I have been selling my jewellery on there for three years, hurrah!
 Thank you to all my customers for supporting my shop and for anyone and everyone who has featured me in the blogs and treasuries too.
To celebrate I am offering 20% off until tomorrow morning, on all items in my shop.
Use the code 'Happy Anniversary' and I'll refund 20% off the cost of your item.
Excludes shipping and custom orders.
yay!
 Deepa
Deepa
Today is my 3rd Etsy Anniversary, or Etsyversary!
I have been selling my jewellery on there for three years, hurrah!

To celebrate I am offering 20% off until tomorrow morning, on all items in my shop.
Use the code 'Happy Anniversary' and I'll refund 20% off the cost of your item.
Excludes shipping and custom orders.
yay!

3 September 2010

2 September 2010
Autumn collection begins

Well now look how much of a hard worker I have been lately!
I have been designing lots of new pieces with a nice Autumn twist - deep purples, ambers, rich reds, vintage metals and simple shapes all feature. And I've been playing with gemstones!
I have some Amethyst in my shop at the moment and I am hoping to introduce more gems very soon, watch this space!
My popular First Date Earrings are back in two colourways - pink and purple and amber and pink. They are ever so sparkly!

My most favourite piece is the Opera Necklace, I spotted this filigree a while ago and couldn't resist it any longer, I am so glad I snapped it up. It is a one of a kind piece, I think the filigree is quite rare too, and ever so elegant.
All of these pieces are for sale in my Etsy shop, some will also be available in my folksy, dawanda and All Things Original shops.
1 September 2010
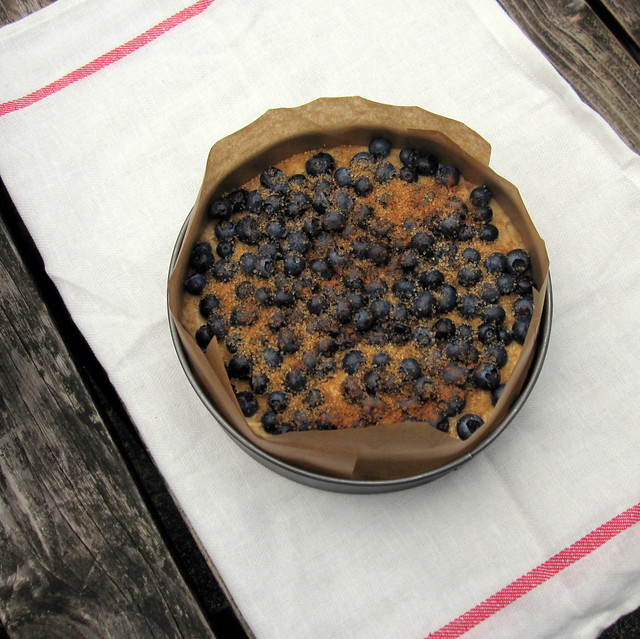
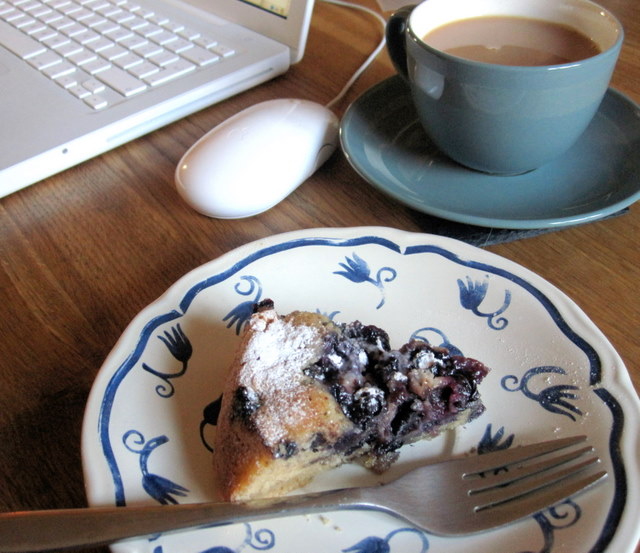
Blueberry & Coconut Boy Bait
I've been hearing about boy bait for a while from smitten kitchen, domestic sluttery and some lovely twitter friends including alice of Snap Dragon Beads.
Such a cute name for a cake, I mean it is really just a cake but if you call it boy bait then everyone wants to makeit - Especially if it has blueberries in. And then I went all out and replaced the buttermilk with some lovely coconut milk instead.
This cake is super easy to make, moist, sugary and has the best name ever.
The coconut flavour only comes through slightly, but it makes up for that by adding moistness and sweetness.
I think I'll add a few tablespoons of desiccated coconut next time.
Blueberry & Coconut Boy Bait - adapted from Domestic Sluttery
125g of brown sugar
1/2 tbsp salt
125g unsalted butter
125g of self raising flour
2 eggs
1 150ml mini tin of coconut milk (these are readily available in most supermarkets, and very handy)
1 punnet blueberries - approx 125g
for topping:
3 tablespoons brown sugar
1 tsp cinamonn
handful of blueberries

Heat oven to gas mark 4 / 350f / 180c.
Cream together the butter and the sugar, then add in your eggs one at a time, combining each time before adding the next.
Add in the flour slowly and then pour in the coconut milk. Stir to combine and then add in the blueberries and the salt.
Pour into a 9 inch round or square cake in. Top with the rest of the blueberries, cinnamon and sprinkle over the sugar generously.
Bake in the oven for 50 minutes until cooked through and golden brown.
Dust with icing sugar, slice and transfer to your mouth!
Subscribe to:
Posts (Atom)