Showing posts with label baking. Show all posts

8 September 2011

German Apple Cake

I love apple cake, it is a very autumnal thing and being as it has felt autumnal for about 3 weeks now I think it is the perfect cake to be baking at the moment. I'll start off with a little disclaimer, I didn't bake this cake, Mr Giraffe did, but it was so yummy that it needed to be blogged about.


This recipe is from Honey & Jam - it is a very simple sponge with none of the usual spicing that most apple cakes have, the sponge is very buttery and light and the apples really stand out. The apples aren't peeled which works suprisingly well, especially if you have good quality apples.


I think we/I will be making this again soon!

1 September 2011

Cambridge Clandestine Cake Club & Banana Oat Cake


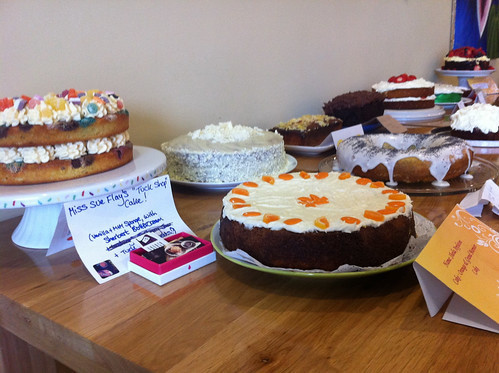
Yesterday I went to the 2nd Clandestine Cake Club for Cambridge held at the fantastic Greens Coffee Co. in Cambourne. You really have to love cake to go to one of these, and fortunately I do. Everyone brings a cake along and then you spend the evening drinking tea and eating your away around all the sugary offerings.

There we over 20 cakes this time and every one looked amazing. I didn't try all of them but I managed 4 slices whilst I was there and took some home - much to Mr Giraffe's delight.

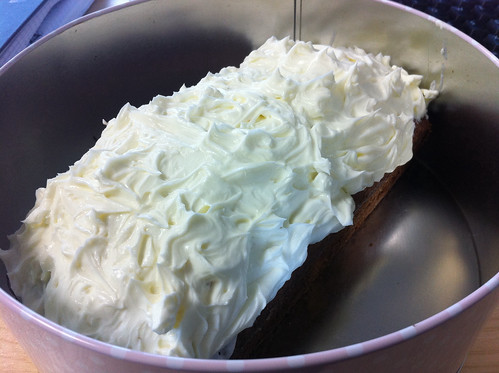
My offering was a Banana and Oat Cake with Elderflower Cream Cheese icing. The cake was originally meant to be vanilla sponge but it came out of the oven dense and flat, and my buttercream failed too. Luckily I'd also made banana bread so I jazzed that up with the icing (made at work the next day, before the club!) which worked really well.


Yummy.

The evening is organised by Miss Sue Flay of tea party fame. I'm really looking forward to the next one.
There are lots of Clandestine Cake Clubs being held by other people around the country - check the website to see if there is one in your town. 

The banana loaf recipe started off wanting to be the one from the Hummingbird Bakery book but I edited it so much it pretty much is a different recipe now. I subbed out a lot of the sugar, used less flour and added oats.

Banana Oat Cake

140g sugar
2 eggs
2 bananas (about 200g peeled weight), peeled and mashed.
140g plain flour
40g porridge oats
1tsp baking powder
1tsp ground cinamonn
1tsp vanilla extract
1tsp ground ginger
100g unsalted butter, melted and cooled.

Preheat oven to 170c / gas mark 3. Grease and line a loaf tin. 

Whisk the eggs and sugar together until well combined. Then add in the mashed bananas and mix well again. Fold in the dry ingredients carefully, and then pour in the melted butter and fold again. Pour into the prepared loaf tin. Bake for 35 - 45 minutes until cooked through.

Elderflower Cream Cheese Icing

I really struggle with buttercream, it tends to split very easily for me. I love cream cheese icing because it is just as decadent but so so much easier to make. This recipe is based on the Jamie Oliver recipe that goes with his carrot cake.

100g mascarpone cheese
200g full fat cream cheese
2 tbsp of elderflower cordial
85g of icing sugar

Mix all the ingredients together in a bowl and then spread all over your (cooled) cake.


14 August 2011

Ridiculously Good Oreo Fudge Brownies

Bet you are already thinking about when you can next bake.

I am very late to this party, I saw the brownies on Lorraine Pascale's show a few months ago (ok it was January, doesn't seem that long ago!) and ooohed over them and then never got round to making them, which is my usual trick. Ireena made them and so did Katie and I ooohed again.
I kept on buying oreo cookies and they'd get opened and suddenly there were no more oreos. So I bought a pack and hid them at the back of the cupboard for a few weeks, and finally today I made oreo brownies.

I make a lot of brownies but I think these might be the best. Rich, sweet and almost moussey in the middle (from whisking eggs, something I've never done for brownies) and very crispy on top - and then you get an oreo in there too - magic!


You should definitely try these, I think they'd be great in place of birthday cake or even for a dinner party. Or for, you know, eating two in a row. The brownie base itself without the cookies is a great one.

I made three alterations - I didn't include the 2 extra egg yolks - mainly because I didn't have enough eggs but really I felt it was a bit unnecessary. The chocolate was just broken into small pieces, I think grating chocolate would get melty and messy! And I had some fudge chunks lying around so I put those on top before baking, they melted into the batter and then when cooled became crispy and sticky, yum!

Recipe on BBC Food.

9 August 2011

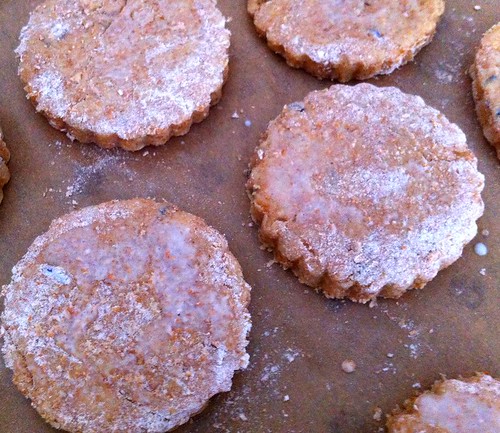
Lavender Wholewheat Scones

Until now I have only ever used lavender in my bath, probably like most of you. There are a few things that lavender really works with especially sweet things. I've heard lovely things about lavender panna cotta, I've eaten lavender shortbread before. I've seen some people put it with lamb but I'm not entirely convinced about that.

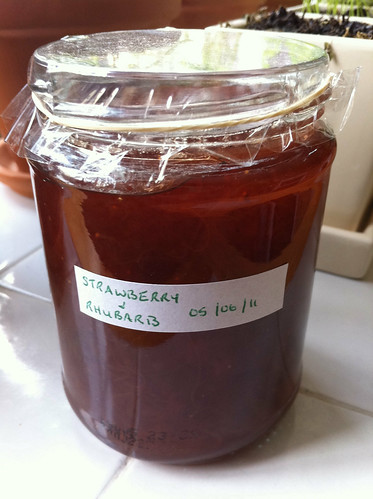
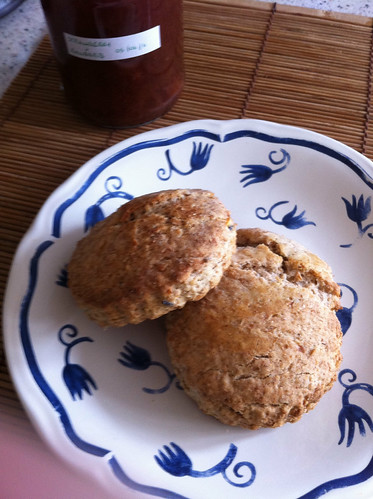
I had been given some very nice strawberry and rhubarb jam and the best thing to do when you get jam is make scones! The perfume of the  lavender in the scones works really well with the sweet jam, and I think the wholemeal flour makes it nutty, meaning the lavender doesn't overpower.


I am by no means an expert on scones yet, these still didn't have the required oomph that I was looking for, I think they need self raising flour, which I keep forgetting to buy. And in fact I keep forgetting to get more plain flour too, hence the reason for wholemeal - which worked out nicely anyway!


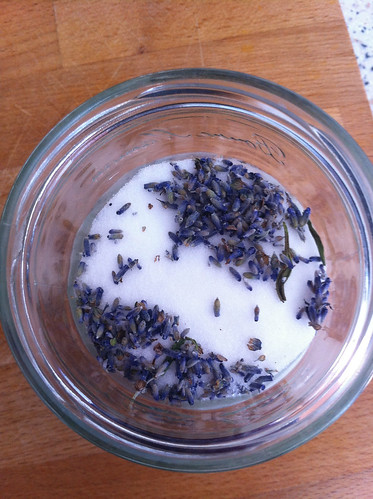
I used this recipe, subbing with wholemeal and 2 teaspons of baking powder. And my lavender was in the form of homemade lavender sugar (grab a bunch of lavender flowers, hang upside down for a month, remove purply bits, add to a jam jar of caster sugar, wait a week), so I just replace the plain sugar with that.

The lavender comes through really well, not too soapy and just the right amount of perfumeyness.
They are perfect for a tea party!

14 June 2011

Gooseberry Crumble Cake


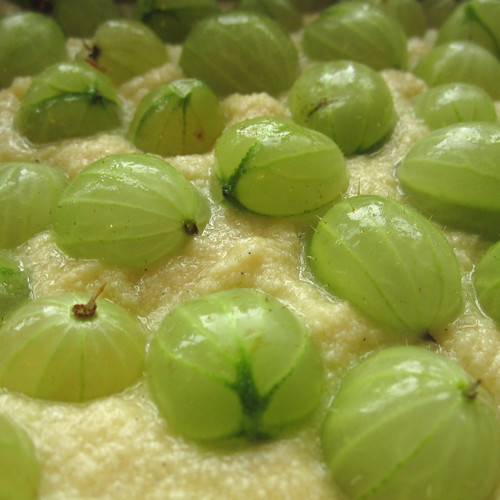
I think gooseberries can be a bit daunting. They are all hairy and a bit weird looking when raw, not to mention sour. But add a bit of sugar, cook them for a while and they are gorgeous. I tend to treat them like rhubarb, and my favourite thing to make with rhubarb is a crumble cake.


Crumble cakes (or coffee cakes as they are known in the USA, though they have no coffee) are impressive looking and tasting but really easy to make as they just combine two very basic recipes. They work particularly well with rhubarb and gooseberries as the double blanket of sugariness, batter and crumble, will make sure your fruit isn’t too tart.

I have previously made a rhubarb crumble cake (with a really bad photograph) but it was huge so I have dialled back the quantities a bit to make a slightly smaller cake. This is still a generous cake so will serve 6 people easily!

I made this cake with lots of vanilla and swapped half the flour for ground almonds to add more taste to the cake part. The crumble top was the basic equal parts of sugar, flour and butter mixture, and I sprinkled some more ground almonds on before baking which made the top extra crunchy.

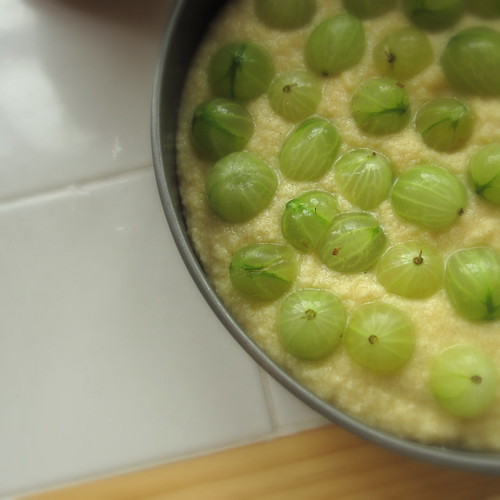
The gooseberries are prepared very simply, I just topped and tailed them and sprinkled them with sugar.


Gooseberry Crumble Cake

Makes one 9 inch round cake

For the cake:
100g of softened salted butter
100g sugar
2 eggs
50g of ground almonds
50g of flour
1 teaspoon of vanilla paste or equal of vanilla extract
Splash of milk.
125g fresh gooseberries

Cream your sugar and butter together until nice and fluffy, then add the eggs in one by one and mix together after adding each. Then put your vanilla in and then fold in the almonds and flour. Mix to combine and then add a small splash of milk to loosen the mixture.
Pour into a greased and linked cake in.

Preheat your oven whilst you prepare the crumble and fruit. 170c /  gas mark 4

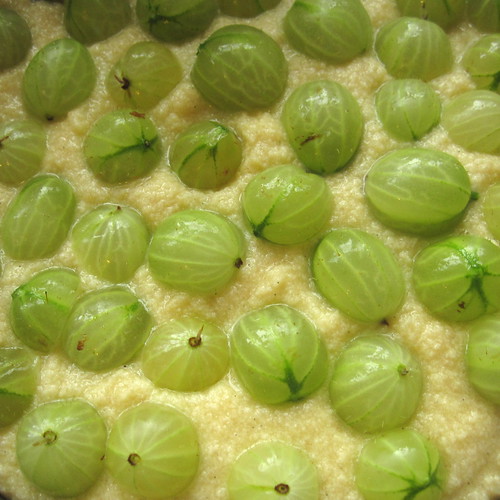
Top and tail your gooseberries. Cut the bigger ones in half but leave the smaller ones whole. Arrange on top of the cake batter and sprinkle with tablespoon of sugar.

For the crumble top:
50g butter
50g sugar
50g flour
Sprinkle of ground almonds

Rub together your butter and flour til it resembles breadcrumbs, and then add in your sugar. Sprinkle over the gooseberries, make sure they are fairly well covered but it doesn’t matter if they are peeking out a bit. Sprinkle over the almonds.

Bake in the oven for about 30 – 40 minutes until golden brown on top. It can be hard to tell if is done as the knife won’t come out clean, as long as it is cooked at a low temperature on a middle shelf it won’t burn.

Leave to cool, the cake will sink slightly. If you take it out the tin whilst it is warm it will collapse.

Slice and serve with custard, it is good with custard!


My gooseberries were from Walden Local Food, if you are nearby you must go and visit their market stall on a Saturday. I also came away with some fabulous plum tomatoes and some tender new season kale.

26 May 2011

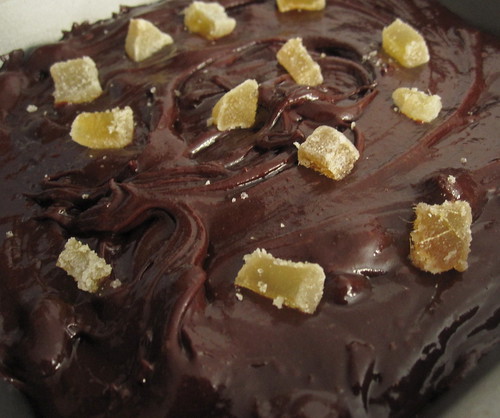
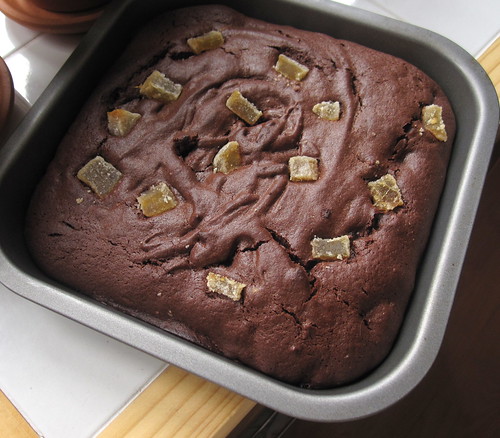
Candied Ginger Brownies

You'd think I would have enough brownie recipes on here but I don't think there is such a thing as too many brownie recipes, or too many brownies!

Lately I have been more of a fan of brownies with things in them, before I was more of a chocolate nut and just wanted them to be as chocolatey as possible - which is obviously no bad thing either. But sometimes it is fun to experiment!


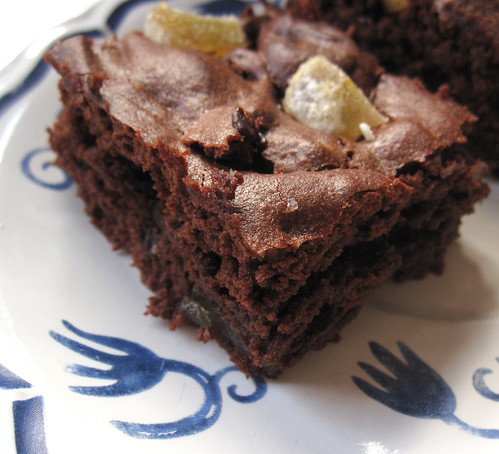
Spiced brownies are lovely and these candied ginger ones give you a good hit of ginger in each bite, and a bit of texture from the candied coating.

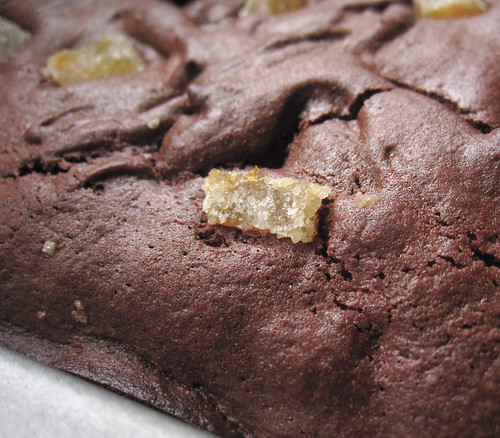
If you really like ginger I would make your pieces big but if you don't chop them up finer than I did, it will all work out fine either way. These are semi gooey brownies, with a nice crisp top.

100g good quality (70% cocoa or more) dark chocolate
70g butter
100g caster sugar
2 eggs
1/2 tsp of vanilla extract
75g self raising flour
1 tsp of baking powder
25g cocoa (or just use more flour)
100g candied ginger, chopped

Preheat your oven to 400f, 200c (180c fan) or gas mark 6

Break your chocolate into pieces and melt together with the butter in a bowl over a pan of simmering water, stirring frequently.
Take the bowl off the heat, leave to cool for a few minutes and then add in sugar and then your eggs one at a time.
Then add in the vanilla. Sift in the rest of the dry ingredients and fold together.
Then carefully fold in your chopped candied ginger, saving some for the top.


Pour into a non stick or greased and lined 9 inch square cake tin and sprinkle over the rest of the ginger. Bake in the oven for 15 minutes.

16 May 2011

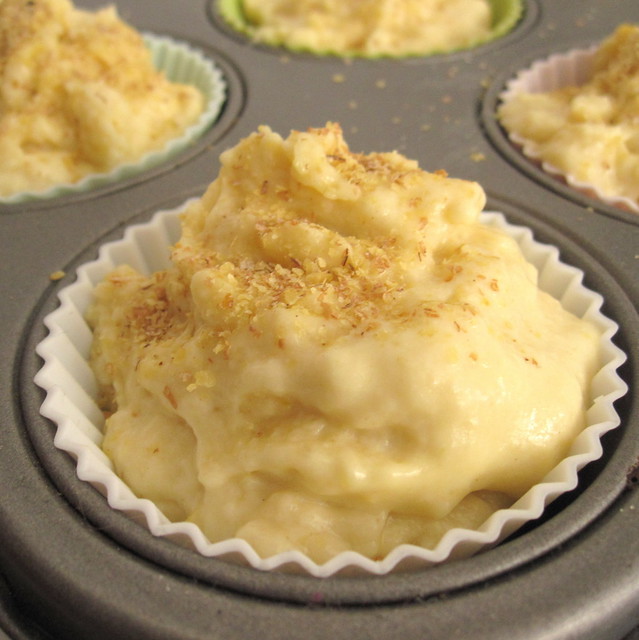
Lemon & Ricotta Breakfast Muffins


I called these muffins so you can eat them for breakfast.
I am kind to you like that.


I made these for three reasons.

1. I had a lot of lemons
2. I wanted to test out my new silicone cupcake breakfast muffin cases

3. I like to eat cake for breakfast.

On a serious note, they do have much less sugar than a cupcake, and of course no icing or buttercream -they aren't particularly sweet, so add more if you want a sweet muffin. They are lovely split open and served with some natural yoghurt and honey.


Lemon & Ricotta Muffins
makes 12 muffins

1 cup (200g) of self raising flour
1/4 (50g) cup of sugar
half teaspoon of baking powder
pinch of salt
2 tablespoons of honey
1/2 (100g) cup of ricotta
1/4 (50ml) cup of milk
3 tablespoons of melted and cooled butter (approx 75g solid)
1 egg
zest of 3 lemons, juice of 2
oats or wheatgerm to sprinkle on top - optional

Preheat your oven to gas mark 4 / 180c / 160c fan.
Mix the dry ingredients together in a bowl. Do the same with the wet ingredients and the egg, whisk them together. Slowly fold the wet into the dry, taking care not to over mix.

do you like my silicone cupcake liners? fancy and useful.

Fill the cupcake cases generously with the mixture, about 1 cm from the top - you want them to rise high.
Sprinkle with some oats or wheatgerm if you'd like.

Bake for 15 - 20 minutes until they are cooked through.

5 May 2011

Lemon Bars for UK Handmade Summer Issue

Hello!

I have been a bit quiet on the blog front recently, I have just started a new job and still getting into the swing of things. Also I had a rotten stomach bug last week which left me with nearly a whole week off unable to bake anything!


I did however recently write a recipe for the UK Handmade summer issue, some gloriously summery lemon bars. It is on page 47, please have a read and the rest of the magazine is just beautiful this month.

I will be back very soon with some new recipes :)


Deepa

31 March 2011

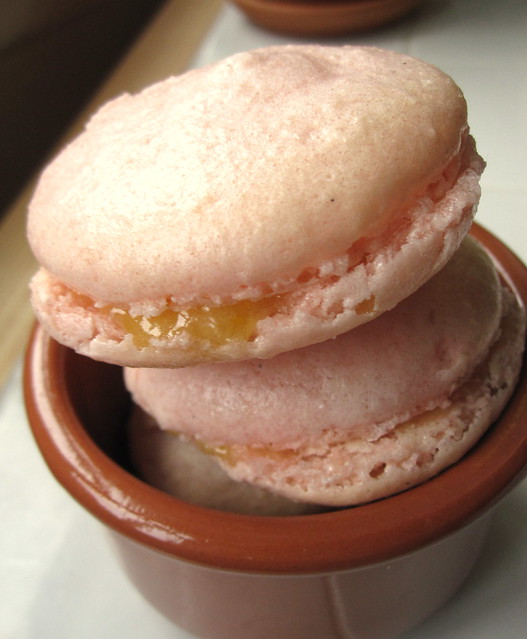
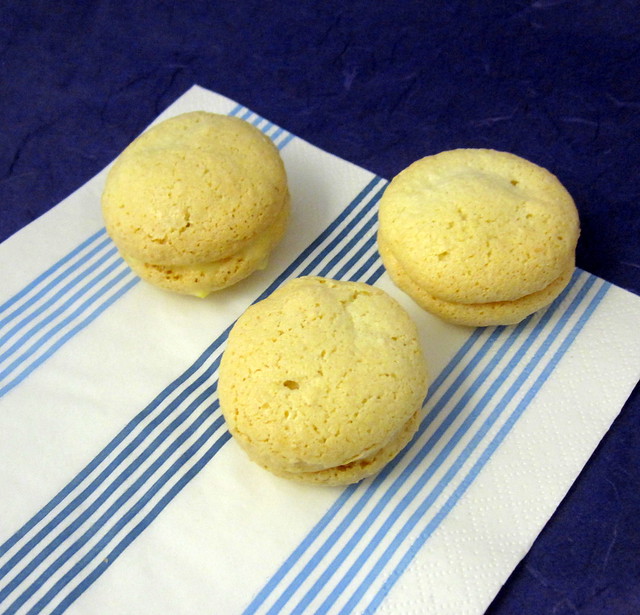
Macarons - v2


I made macarons a little while ago and they weren't quite perfect, they tasted amazing but they didn't have the little 'feet' - mainly because I didn't age the egg whites, and they weren't quite as uniform as I'd like.

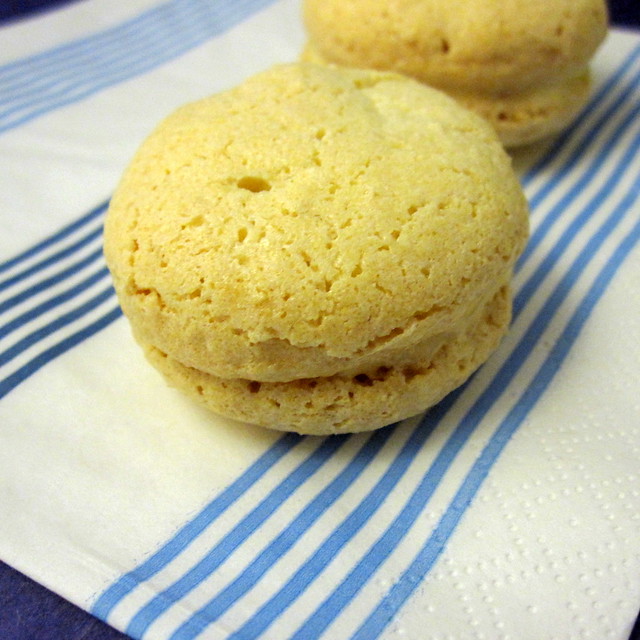
These aren't quite as perfect again, I think macaron making definitely takes practice. I did age the whites and I got a nice crisp shell and 'feet' on my macarons. But I think I needed to pipe them a little smaller, as they were a bit ungainly, macarons are meant to be a delicate and sophisticated French sweet after all.

The macaron shells were flavoured with my new favourite thing - vanilla bean paste, and made pretty with a few drops of red food colouring, for a pinky colour. I sandwiched with lemon curd again, but I am going to try buttercream or maybe a chocolate ganache next time.


Despite their appearance they do taste fantastic, which some would say is the main thing.

I used Ruth's recipe from her blog - The Pink Whisk.

Macaron makers - do you have any tips for me?

20 March 2011

A Lovely Loaf of Bread


I have baked a lot of bread before, no knead bread, one hour bread, soda bread, potato bread and various other things which have been eaten too quickly to blog about. But I never seem to get around to cooking a normal white loaf, you know one you can slice and use for sandwiches and toast. I guess because it is easy to get supermarket bread for that and make fancy bread homemade. But really baking an everyday loaf is really satisfying because you can include in your everyday meals to make them more interesting.


 This recipe has more water in than normal bread doughs and I proved it once for an hour, and second in the loaf tin for 45 minutes. This mean it was moist,  very well risen and airy, I think if I'd left it the second time for another 15 minutes it would have bloomed a bit higher. I sprinkled it with poppyseeds for extra crunch and prettiness.


Simple White Loaf
makes one small loaf


300g (2.5 cups) of strong white bread flour
1 1/2 tablespoons of sugar
3/4 tablespoon of salt
1 flat tablespoon of instant yeast
1 tablespoon of olive oil
150ml of warm water

Mix the dry ingredients together in a large bowl, then make a well in the centre and add the oil and water. Slowly incorporate the flour into the well until it combines fully, mix to a fairly sticky dough. Flour a board well and knead the loaf for a few minutes until it is smooth, you may need to keep adding flour to stop it being too sticky.

Put into a large clean bowl dusted with flour, cover with a tea towel and leave in a warm place for 1 hour.

After an hour turn the dough out and knock it back, kneading lightly for a minute. Then shape into a rough loaf shape and pop into a floured loaf tin. Prove again for 45 minutes to 1 hour in a warm place, covered with a tea towel. Preheat your oven to 180c / gas mark 4 before the proving is nearly up.


Once proved slash the top with a sharp knife, about 3 or 4 slashes should do. This will allow the loaf to rise and air to escape during cooking. Dab with some water or brush with milk and sprinkle on about 1 teaspoon of poppyseeds.

Bake for 30 - 40 minutes in the middle of the oven.

Remove from the oven, grab the butter, slice and spread and EAT!


I think this bread would take really well to other flavourings such as cheese, herbs, sundried tomatoes, whatever you can think of. Sesame seeds and a drizzle of oil would be an nice twist too. The possibilities!

I toasted it the next day and spread it with honey, it toasts extremely well.

9 March 2011

Coffee & Hazelnut Cupcakes


I think I have a cupcake fixation. I think it is because they are a) really easy to make b) cute and c) great to photograph.

I have no less than 7 (now 8) cupcake recipes in my reasonably petite recipe archive. They are a bit like brownies (I have a lot of those blogged too), adaptable and everyone loves them. I don't always like icing or frosting, it can make the cupcake overly sweet for an everyday lunchtime snack, but for special ocasions you have to. My favourite cupcake is lemon drizzle, which is also my favourite cake.


These cupcakes are again super easy and people always swoon when you mention coffee cake in any form - have you noticed that? I played around with the traditional walnut and decided to sub hazelnut instead because I prefer them. There is a mixture of whole and chopped hazelnuts, along with one of the top which gave it a slightly er, protuding appearance - oops!


I am a coffee snob and I much prefer proper fresh ground coffee to instant, but instant is always the best thing to use for baking - unless you can find coffee extract. You can get a much stronger coffee taste, and I've tried using freshly made proper espresso before, than real coffee. Trust me!

Coffee & Hazelnut Cupcakes
makes about 12 cupcakes

200g butter, softened
200g white or brown sugar
4 eggs
175g self raising flour
4 tsps of instant coffee (dissolve about 2 tsps of powder in as little water as possible, approx 75ml)
dash of vanilla extract
chopped and whole hazelnuts - about 100g in total plus extra for the top.

Preheat your oven to 200c / gas mark 6
Cream together your butter and sugar with a spoon and then whisk in the eggs one by one, mixing well to incorporate each time. Add in your vanilla, coffee and then the flour, folding in, try not to overbeat. Then add in your hazelnuts.

Line a muffin tin with cupcake cases, and fill to about 2/3 full, top with hazelnuts. Bake for 10 - 15 minutes til cooked all the way through.

I did intend to ice them with chocolate and coffee icing but trying to eke out some leftover chocolate frosting with extra coffee and milk made it go all runny, whoops! I experimented with one but the chocolate just wouldn't set, but it was tasty when topped with more hazelnuts.


P.S. The other cupcakes in the picture are lemon cupcakes, recipe in the Hummingbird Bakery Book :)

27 February 2011

Rhubarb Custard Cake with Lemon Glaze

Forced rhubarb time is here! It definitely feels like spring time when seasonal fruit comes back into the shops. I love the colour of forced rhubarb too, shocking pink just reminds me of summer time rather than dull old February.


I bake with rhubarb a lot, cakes, cupcakes, pies, simple crumbles and jam. This recipe is super simple to make, the crumb is creamy - to me it actually tastes of custard  - and we all know what rhubarb goes with! This batter has more eggs and less flour, hence the custard taste, and the juices from the rhubarb seep out whilst it makes which makes it extra moist.


I experimented with a lemon glaze too, rhubarb is sour but I think the glaze works surprisingly well.

Rhubarb Custard Cake
makes one cake, I baked mine in a 7 inch square tin.

150gs of softened unsalted butter
150gs of white sugar plus extra for the top
2 eggs
1 tsp vanilla extract
100gs self raising flour
1/2 tsp of baking powder
zest of one lemon
2 large sticks of rhubarb

Cream the butter and sugar together until pale and fluffy, mix in your eggs one by one and then the vanilla. Fold in your zest, flour and baking powder til just combined. Pour the batter into a greased and lined cake tin (mine was non stick so I didn't use any baking paper)
Trim your rhubarb and chop into 1 inch pieces, arrange over the top of the cake, sprinkle about a tablespoon of sugar over the top, this will add a bit of extra sweetness to the rhubarb.

Bake in the oven for 25 minutes at 200c / gas mark 6 til cooked through. When a knife is inserted it won't come out absolutely clean because it is quite a moist cake, a few crumbs should stick.

Leave to cool for about 5 minutes and then very carefully transfer to a plate or a board to allow you to glaze the cake.

For the lemon glaze
juice of one lemon
dash of vanilla extract
approx 70g caster sugar

whisk both together until well combined, the sugar doesnt have to dissolve as you want a nice crunchy top. Spoon over the warm cake and leave for as long as you can before grabbing yourself a slice.

This cake is just lovely out of the oven as it is incredibly crispy on top, you can reheat it slightly from cold to crisp up again too.

23 February 2011

Starting a Sourdough Starter

I have started a sourdough starter! I started it on Sunday, so far it is going well and I had bubbles last night. I am probably too excited about it. Hopefully I can make some sourdough over the weekend.


This blog post from Joy the Baker is super useful, some of the other recipes out there are ESSAYS on the subject, really it is simple. One cup of bread flour. One cup of water. Blend. Every 24 hours for the first 3-4 days you need to feed it. Do this by throwing half away, and adding half cup of water and half a cup of flour. Stir. Leave in a warm place. Once it has established itself you keep it in the fridge and feed it once a week.


(if anyone knows how to take an attractive picture of this big yeasty floury mess I'd be grateful, haha).

24 January 2011

My First Macarons & Using Up Your Egg Yolks Lemon Curd

Hurray some food blogging!

I've been a bit remiss since Christmas (ok way before then) even though I've been baking lots of things and making lots of things.

Macarons have been on my lists for ages and ages, our last house had the worse oven on the planet, it couldn't even cook a baked potato evenly so I wasn't trusting it with macarons. Since we have moved we have a nice shiny electric oven which keeps the temperature even and cooks things nice and quickly. I can now bake a whole cake in less than an hour and without checking it every 2 minutes impatiently.

This also means I can now make meringues, lemon meringue pie specifically! Yum.

I used the recipe over on The Catty Life, she embued me with confidence that I Can Do It. Macrons scared me a bit, maybe I read too much into them and worried about how hard they would be.

I didn't age my egg whites, like you should, because I forgot. I still got the taste of macarons and the airy inside, but I didn't get the longer for 'feet' and a thicker shell. You can make macarons with un-aged egg whites but they won't be as pretty!


Vanilla Macarons with Lemon Curd Filling 
recipe from the catty life 

100g ground almonds
200g caster or icing sugar (I used caster which was fine)
50g caster sugar
3 egg whites - preferably aged by leaving them in a bowl at room temperature for 24 hours.
squirt of vanilla extract

Whip your egg whites still they start to foam/turn white, then add in the 50g of caster sugar slowly to combine. Whisk further til you the eggs form stiff peaks, add in the vanilla extract.
Combine the almonds and the 200g of sugar in a bowl, mix, then carefully fold them in to the meringue mix, adding it in quarters til combined.
Using a piping bag dot the mixture on to a lined baking tray, mine were about 1.5 inches wide, they don't spread too much in the oven.
Leave for 30 minutes to an hour til the mixture sets a little, it should form a 'shell' on the top.
Bake at 150 degrees celsius for 15 minutes. Keep checking, the recipe says 10 minutes but I needed a bit longer.

Remove when cool by sliding a knife under each macaron.
Sandwich with lemon curd, eat four in a row like I did.


Lemon Curd
This lemon curd is great because you can use up your leftover egg yolks from the macarons.

3 egg yolks
100g caster sugar
juice and zest of one lemon
50 grams of unsalted butter, cubed

Beat the egg yolks and caster sugar in a heatproof bowl using an electric whisk til the sugar has dissolved.
Then place the bowl over a saucepan of boiling water, add in the lemon juice and zest plus the butter. Whisk to melt the butter, the eggs should start to thicken, keep whisking. Keep an eye on the heat as you don't want the eggs to scramble. The mixture is done when it coats the back of a wooden spoon - it will thicken further as it cools.
Immediately pour into hot sterilised jars (this actually makes one jar) and seal. Keeps for 2 weeks in the fridge, after opening.

13 December 2010

Easy Peasy Mince Pies


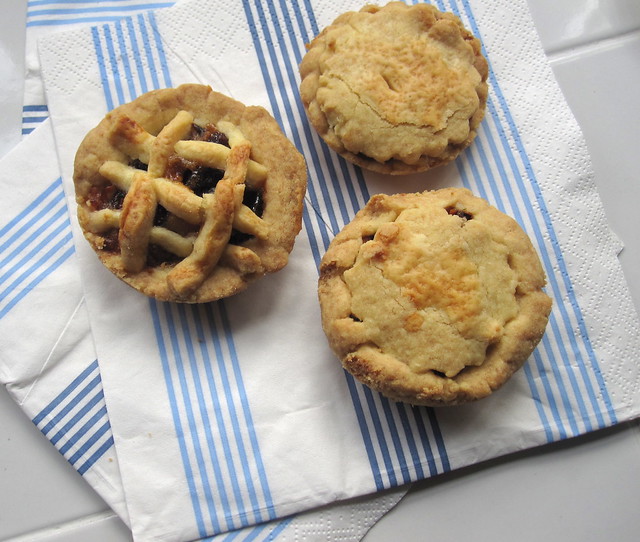
I love homemade mince pies, shop bought ones are always disappointing, too much filling and horrible dry pastry. Mince pies are also very satisfying to make, they seem like a big achievement but they can be really easy.

I was given a jar of homemade mincemeat which went into these pies, it was much lovelier than shop bought - not too sweet, boozy and well spiced.

The pastry contains no liquid, just butter, flour and sugar. A lot of butter, which is what makes it stick together. The resulting pastry case is very close to shortbread but crisper and sweeter. I think these took me just over an hour to make, most of the time was spent because I had to bake in two batches.

They are not the prettiest mince pies ever, not neat but what I like to call 'rustic'. They taste brilliant though, which is what matters!


I played around with the mincemeat, the first batch had pure mincemeat but the second I added some chopped hazlenuts and grated apple (spotted that tip on Kirstie and Phil's Christmas) which added lovely texture and also meant I could eke out the mincemeat more.

Makes approximately 16 - 18 mince pies
adapted from BBC Good Food

225g very cold butter
350g plain flour
100g granulated or caster sugar
1 jar (about 300g) mincemeat
egg or milk to brush over tops

Add your flour to a large mixing bowl, then grate in all of your butter. Grating cold butter means that you have finer strands in your flour which allows you to incorporate it better. Rub into the flour til you have a texture like fine crumble. Mix in your sugar and start to knead into a dough, the butter will be warmer now and so you will be able to work into a dough. Try not to add any liquid as your pastry will shrink in the oven later on.
Once it starts to form knead briefly and it is ready to use.

Preaheat oven to 200c (180c fan) or gas mark 6.
Lightly grease a nonstick cup tin, you don't have to but I wasn't going to trust my tin entirely after last year!
To form the bottoms you can either form walnut sized pieces of dough, flatten and then spread out into each cup to form a base. Or you can roll out the dough carefully (using plenty of flour) and use pastry cutters. I found the pastry cutters a better method although a little more time consuming. Form tops using pastry cutters or small sized balls squashed out.
You can also go for a lattice effect (which may look neater than mine, I am sure) or top with chopped nuts - both of which are delicious.

Brush the tops with beaten egg or milk, bake for 20 minutes til golden brown.
Leave to cool for 5-10 minutes before taking them out of the tins.